Over years of working with clients and refining my own fitness routine, I’ve discovered that the right equipment can make all the difference. Clients are always asking which items they should get. I (finally) curated a list of 10 items that have become staples in my training arsenal, each serving unique purposes that complement different aspects of my wellness journey. Whether you’re looking to enhance your workouts, improve recovery, or add variety to your routine, these tools deliver real results. Proper training is only one piece of the puzzle, which is why I also share the supplements I personally use to support recovery, strength, and energy during perimenopause.
Many of these tools—like the weighted vest, Pilates Bands, and Yoga tune up balls—are items I personally use and often recommend to clients. I’ve linked my exact favorites below so you can check current prices and details on Amazon.
1. BOSU Balance Trainer
The BOSU (Both Sides Up) is one of the most versatile pieces of equipment I own. This half-dome platform challenges your stability and engages your core in ways flat surfaces simply can’t. Before having kids this was hands down my favorite item. While I have several others now, this is still a staple of mine.
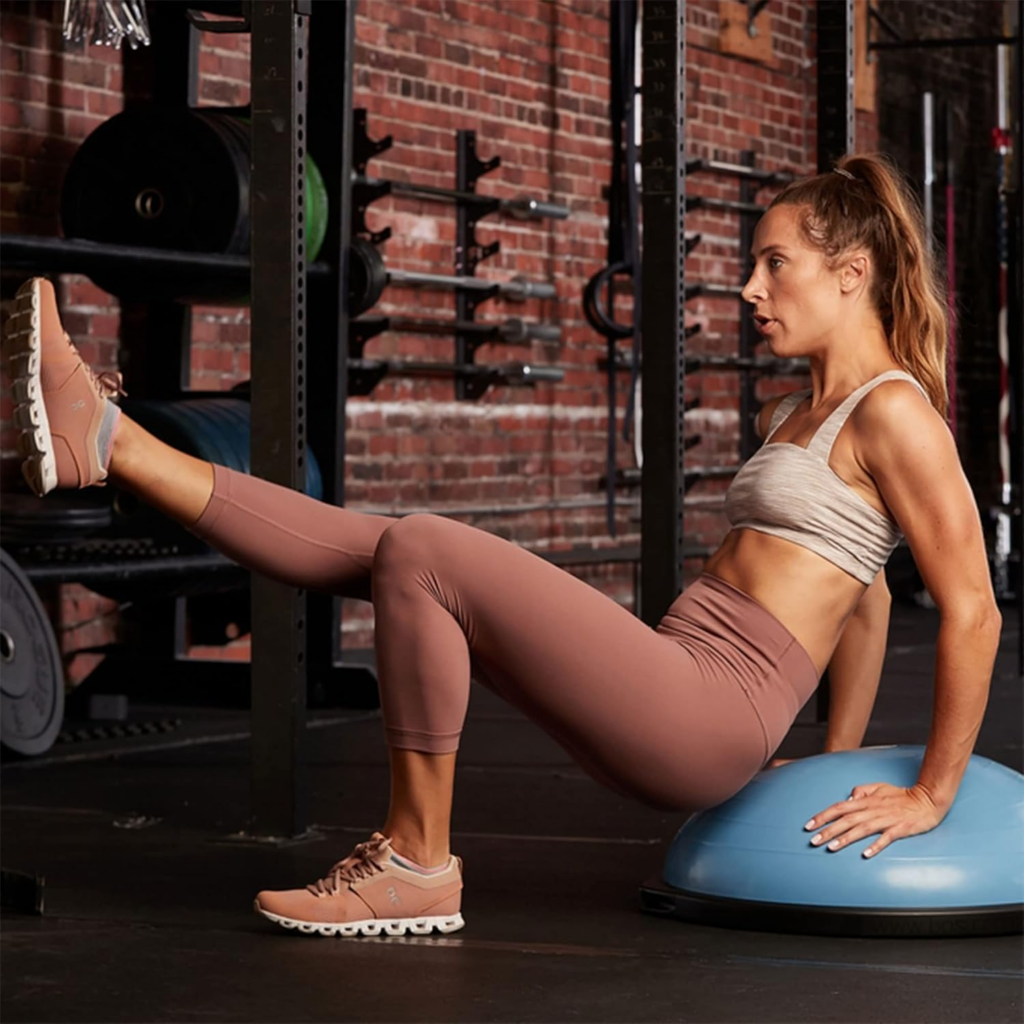
Why it’s great: For this reason, The unstable surface forces your stabilizer muscles to work harder, improving balance, coordination, and functional strength. It’s particularly valuable for injury prevention and rehabilitation, as it strengthens the small muscles that support your joints. I love using this to help clients integrate functional core and balance exercises.
How I use it: I incorporate the BOSU into squats, lunges, and push-ups for an added balance challenge. Flipped dome-side down, it becomes an excellent platform for plank variations and mountain climbers. My favorite use is for single-leg exercises—standing on one leg while performing bicep curls or shoulder presses dramatically increases core engagement. The BOSU can be especially helpful for new moms (and busy moms) looking to integrate more core work into compact workouts.
👉 This is the exact BOSU I use with my clients for balance and core work.
Key exercise: Try BOSU ball squats. Stand on the dome side and perform slow, controlled squats. The instability forces your core and leg stabilizers to fire throughout the movement.
2. Booty Bands (Resistance Loop Bands)
Don’t let the playful name fool you—these resistance bands are serious training tools for lower body development and glute activation. Since having kids, they have become an essential item in my tool kit. They have woken up my glutes and have helped me train them in more effective ways. I love using them while using heavy weights as well.
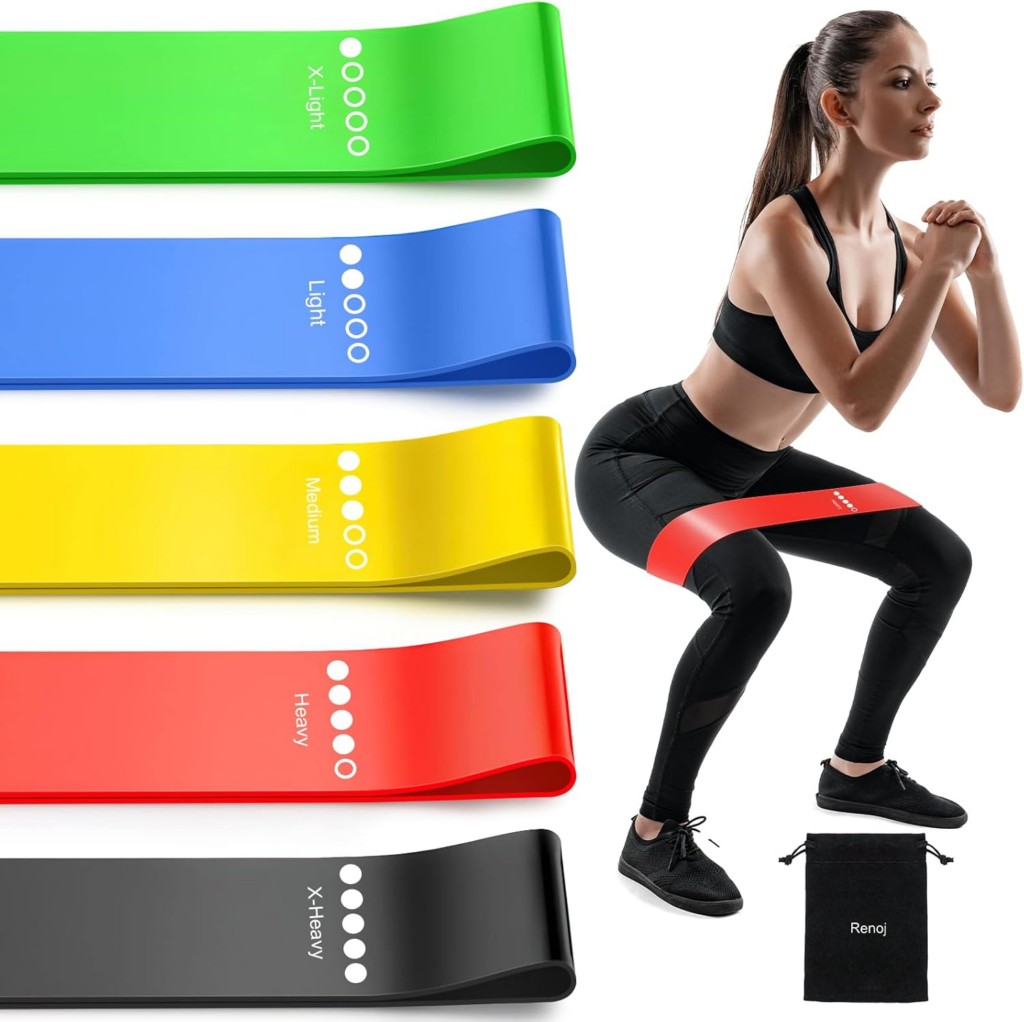
Why they’re great: Booty bands provide constant tension throughout exercises, which is particularly effective for glute engagement. Unlike weights that rely on gravity, bands create resistance in all directions, allowing for lateral movements that target the often-neglected gluteus medius. They’re also portable, affordable, and perfect for warm-ups or full workouts.
How I use them: Because of this, I never skip my band warm-up before lower body training. Lateral walks, clamshells, Platypus walks, and glute bridges with a band activate my glutes before heavier lifts, which improves my squat and deadlift performance. I also use them for high-rep burnout sets at the end of leg day.
👉 These are my go-to bands for glute activation and lower-body warm-ups.
Key exercise: Banded lateral walks are essential. We spend most of our time moving forward, lateral movement is so important to wake up the glutes. Place the band just above your knees, get into a quarter-squat position, and take controlled steps sideways. You’ll feel the burn in your outer glutes and hips almost immediately.
3. Foam Roller
My foam roller might be the most-used recovery tool I own. It’s a game-changer for muscle tension, flexibility, and post-workout recovery. Currently I am loving using it for at home Pilates type exercises and Hack Squats!
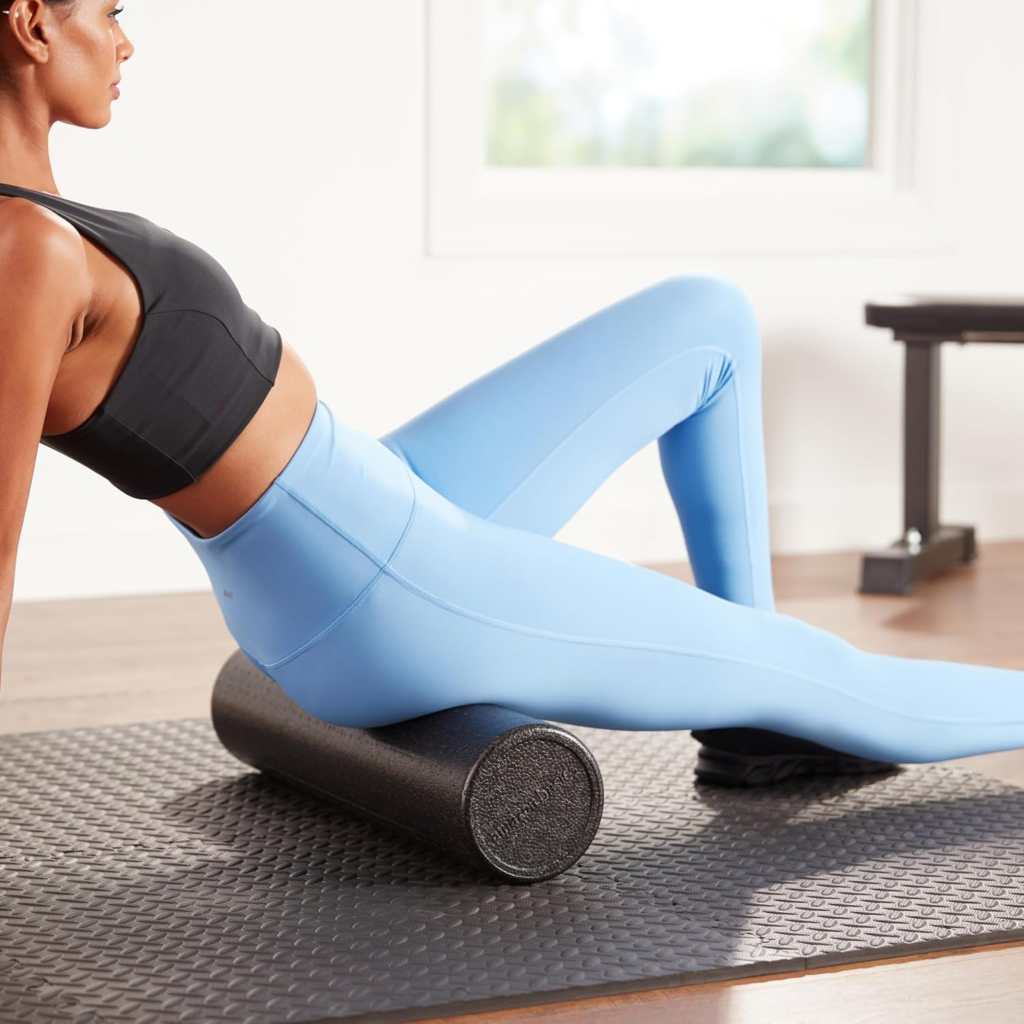
Why it’s great: As a result, Foam rolling promotes myofascial release, helping to break up adhesions in your muscles and fascia. This can reduce muscle soreness, improve range of motion, and enhance blood flow to tissues. Regular use can prevent the muscle tightness that often leads to injury or compensatory movement patterns.
How I use it: I spend a few minutes foam rolling before and/or after intense workouts, focusing on my IT bands, quads, hamstrings, and upper back. I also use it on rest days when I’m feeling particularly tight. For especially stubborn knots, I’ll pause on tender spots for 30-60 seconds, allowing the pressure to release the tension.
👉 If muscle tightness or soreness is an issue, this is a recovery staple.
Key technique: When rolling your IT band, lie on your side with the roller positioned between your hip and knee. Roll slowly, and when you find a tender spot, pause and flex and extend your knee several times. This movement helps release the tension more effectively than just rolling back and forth.
4. 9-Inch Pilates Ball
This small, squishy ball is deceptively challenging and adds an element of instability and resistance to Pilates and core work. This has become an essential tool in my core work – especially since having kids. It also travels really well.
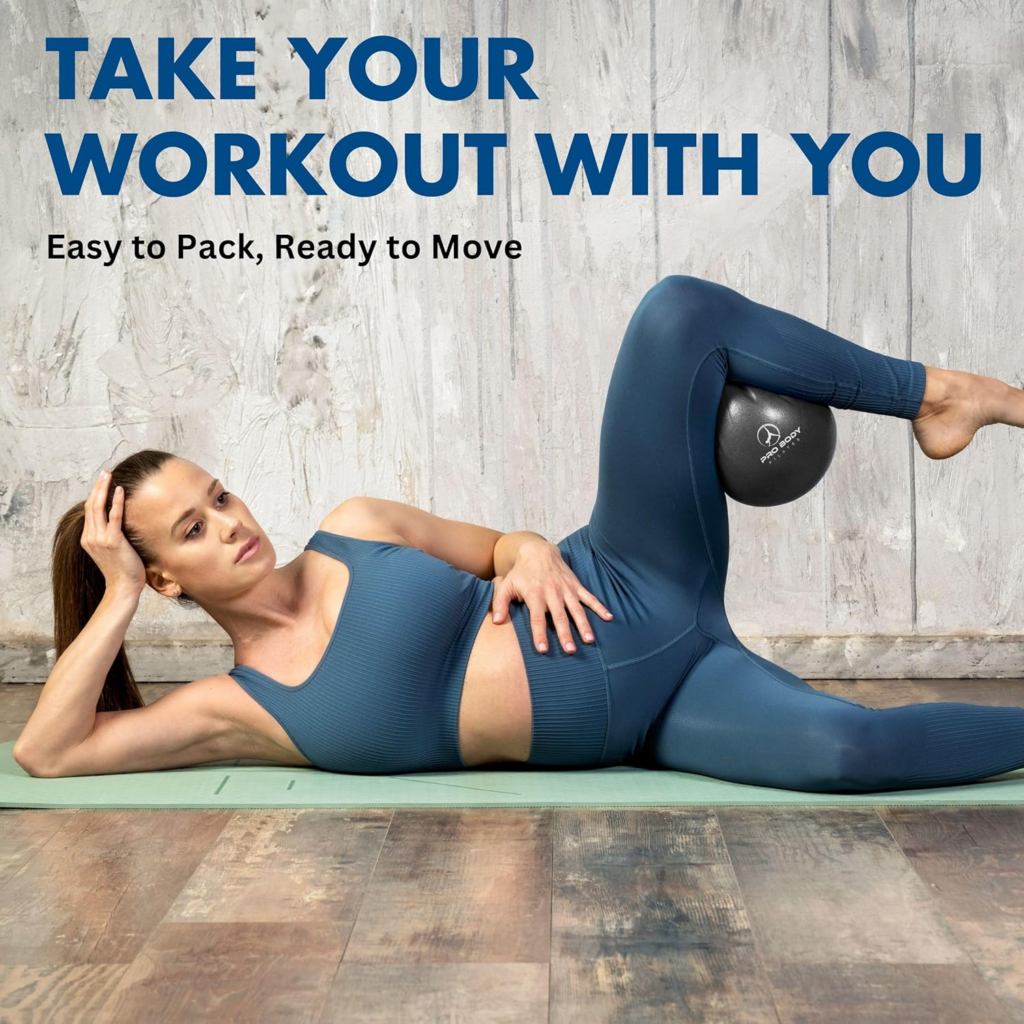
Why it’s great: The 9-inch Pilates ball is perfect for targeted muscle engagement, particularly for the deep core muscles, inner thighs, and postural muscles. It provides gentle resistance and can be used to create small, controlled movements that build strength and mind-muscle connection.
How I use it: In practice, I place it between my knees during bridges to activate my inner thighs and pelvic floor. During core work, I squeeze it between my hands while in a plank position to engage my chest and arms differently. It’s also excellent behind my lower back during abdominal exercises to support proper spinal alignment.
👉 This small tool adds a surprising challenge to core and Pilates work.
Key exercise: Try adductor squeezes during a bridge hold. Lie on your back with knees bent, the ball between your knees, and lift your hips into a bridge position. Hold the bridge while pulsing squeezes on the ball—your inner thighs and glutes will be on fire.
5. Weighted Vest
Weighted vests have become all the rage in the Peri-menopause world. I needed to see what all the hype was for myself. At first, I was skeptical—but I’ve completely changed my mind.
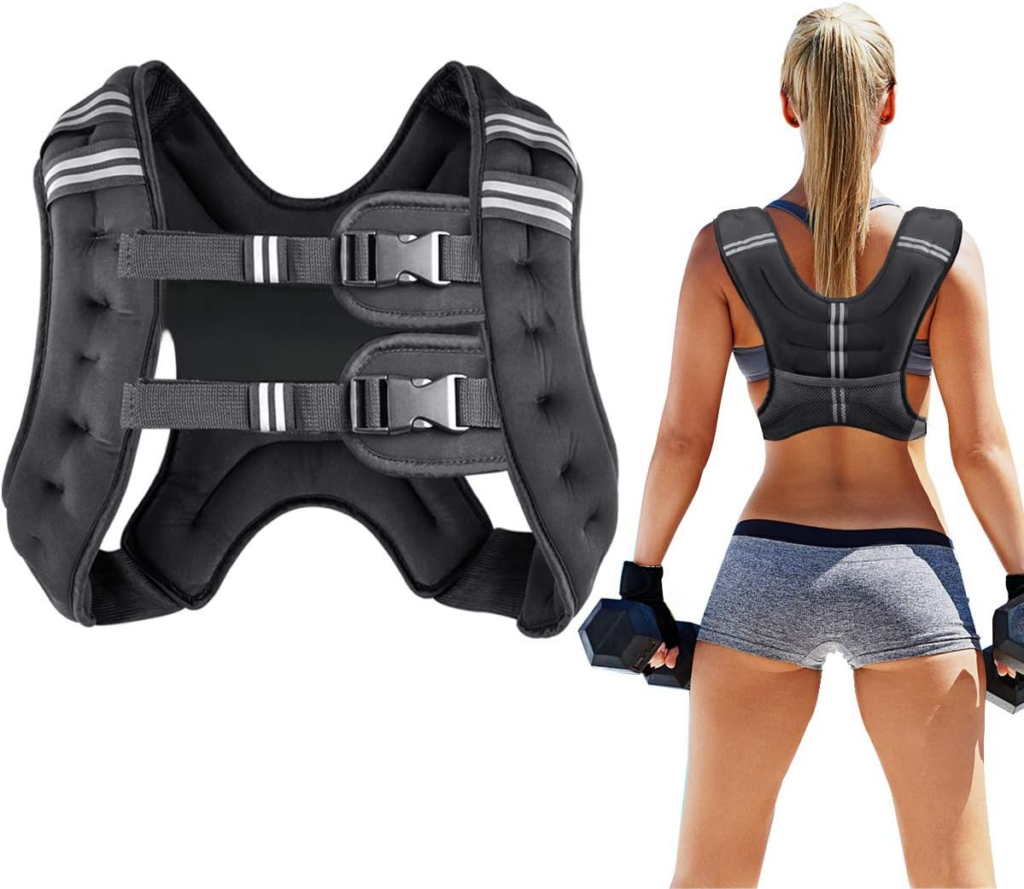
Why it’s great: At the same time, A weighted vest increases the intensity of walking or hiking, it adds cardiovascular and bone-density benefits without altering your center of gravity as much as holding dumbbells would.
I have even begun experimenting with short sprints. It’s excellent for building strength endurance and can make previously easy exercises challenging again.
How I use it: I wear it for a moderate-paced walk to add gentle resistance training. Starting with 5% of my body weight, I’ve gradually increased the load as my strength has improved.
👉 This is the weighted vest I use to increase intensity without overloading joints.
Key tip: Start light—even 10 pounds can feel significant during high-rep exercises. Focus on maintaining proper form rather than adding too much weight too quickly.
6. Therapy Balls for Fascia Release
These firm, small balls (similar to lacrosse balls) are precision tools for targeting specific trigger points and releasing fascial restrictions. My favorite ones are from Jill Miller’s Tune Up Fitness.
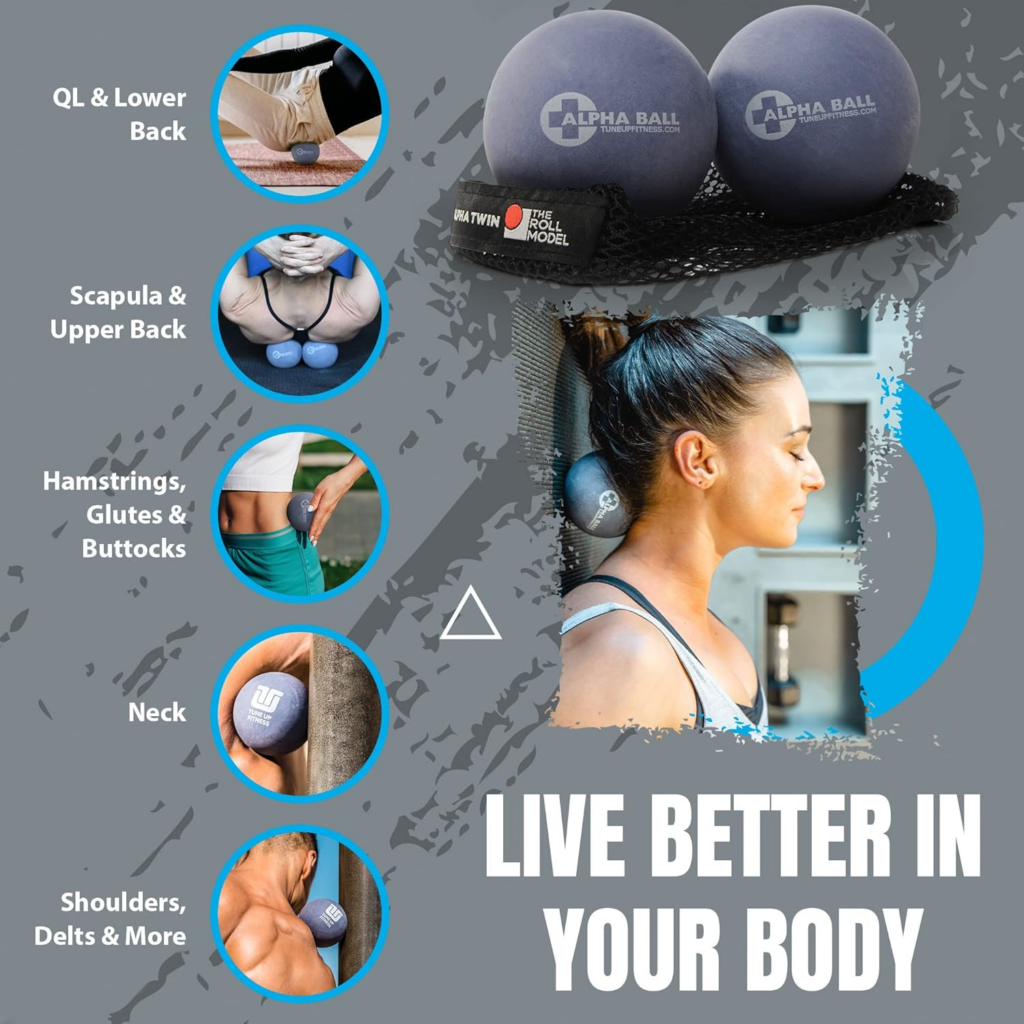
Why they’re great: While foam rollers work well for larger muscle groups, therapy balls allow you to apply focused pressure to specific adhesions and trigger points. They’re particularly effective for areas like the glutes, feet, chest, and shoulders where a foam roller is too broad. The targeted pressure can release chronic tension and improve tissue quality in ways that general stretching cannot.
How I use them: For example, I use therapy balls against a wall or the floor for my shoulders and upper back, and on the floor for my glutes and feet. For plantar fasciitis prevention, I roll my feet on the balls every evening. I also use them for pec release by placing the ball between my chest and a wall, then slowly moving to find and release tight spots.
👉 For targeted muscle and fascia release, these are hard to beat.
Key technique: For glute release, sit on the ball positioned under one glute cheek. Cross the ankle of that side over the opposite knee and lean into the ball, rolling slowly to find tender points. When you find one, pause and take deep breaths, allowing the muscle to release.
7. Tower Trainer – Body By Jake
The Tower Trainer is a compact, vertical resistance training system that has revolutionized my home workouts. This space-saving design delivers a full-body workout without the footprint of traditional gym equipment.

Why it’s great: The Tower Trainer combines multiple resistance levels with a pulley system that allows for over 80 different exercises targeting every major muscle group. Its vertical design means it takes up minimal floor space, making it ideal for home gyms or small apartments. The resistance bands provide smooth, joint-friendly tension that’s safer than free weights for many movements, particularly for those with previous injuries.
How I use it: In my own training, I rely on the Tower Trainer for upper body pulling movements that are difficult to replicate with other home equipment—lat pulldowns, rows, and tricep extensions are staples in my routine. I also use it for rotational core work and functional movement patterns that improve my athletic performance. The adjustable resistance levels mean I can do heavy, low-rep strength work or lighter, high-rep endurance training. I also love using the lower attachments and doing traditional Pilates reformer work with it.
👉 This compact system has completely transformed my home workouts.
Key exercise: Standing chest press with rotation. Position yourself facing away from the tower, grab both handles, and press forward while rotating your torso. This engages your chest, shoulders, core, and obliques in one functional movement.
8. Pilates Resistance Bands
These long, elastic bands with handles or loops have become essential for my Pilates practice and rehabilitation work. Unlike loop bands, their length allows for a greater range of exercises and progressive resistance.
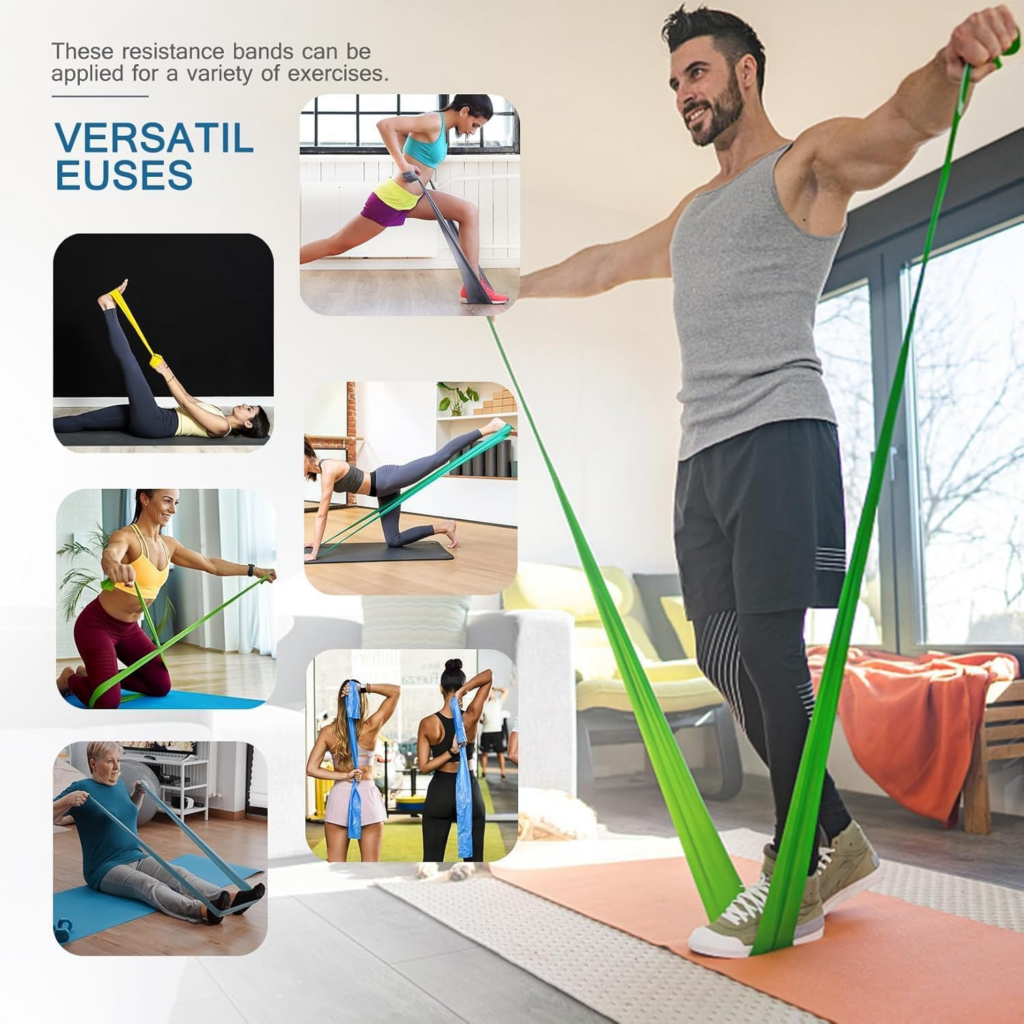
Why they’re great: Additionally, Pilates bands provide variable resistance that increases as you stretch them, creating constant tension throughout the entire range of motion. They’re exceptional for developing long, lean muscle tone and improving flexibility simultaneously. The controlled resistance is perfect for rehabilitation work and for targeting smaller muscle groups that are often missed in traditional strength training.
How I use them: I incorporate them into my Pilates mat work for added resistance during hundreds, leg circles, and arm work. They’re excellent for assisted stretching—I loop them around my feet for hamstring stretches or use them to deepen shoulder mobility work. I also use them for standing exercises like bicep curls and shoulder raises with a mind-muscle connection focus. I also use the Anchor Strap with these (see below).
👉 These bands are perfect for controlled strength, mobility, and Pilates work.
Key exercise: Seated row with focus on scapular retraction. Sit with legs extended, loop the band around your feet, and pull back while squeezing your shoulder blades together. Move slowly and deliberately, feeling each muscle fiber engage. This builds upper back strength while improving posture.
9. Anchor Strap for Door
This simple piece of equipment has unlocked an entire gym’s worth of exercises using just a door and resistance bands or suspension trainers. It’s one of the best investments for maximizing workout variety at home. Nothing needing installation!
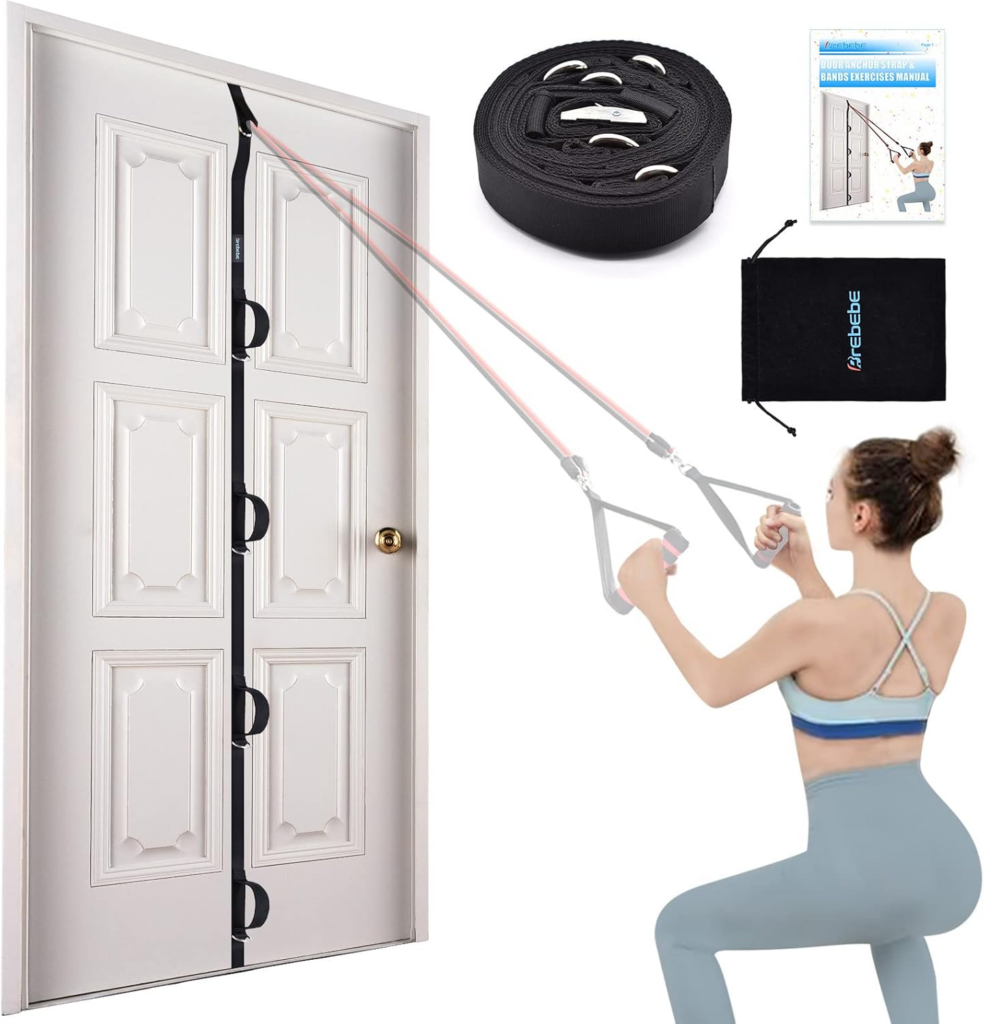
Why it’s great: This means a door anchor allows you to attach resistance bands, TRX straps, or cables at various heights, transforming any doorway into a functional training station. You can perform cable-like exercises that would typically require expensive gym equipment. It’s portable, installs in seconds, and opens up training angles that floor-based exercises can’t provide.
How I use it: I attach resistance bands to the anchor for high-to-low and low-to-high cable movements—face pulls, wood chops, tricep pushdowns, and standing chest flies. By adjusting the anchor height, I can target muscles from different angles, which is crucial for complete development. I also use it for partner-assisted stretching and for anchoring bands during speed and agility drills.
👉 This simple tool turns any doorway into a full workout station.
Key exercise: Face pulls for posterior shoulder health. Anchor the band at upper chest height, grab both ends, and pull toward your face while separating your hands and squeezing your shoulder blades. This counteracts the forward shoulder posture many of us develop from sitting and helps prevent shoulder injuries.
10. Pull Up Assistance Bands (Loop Bands)
These heavy-duty loop bands have been instrumental in helping me progress toward unassisted pull-ups and building serious upper body strength. They’re far more versatile than just a pull-up aid.
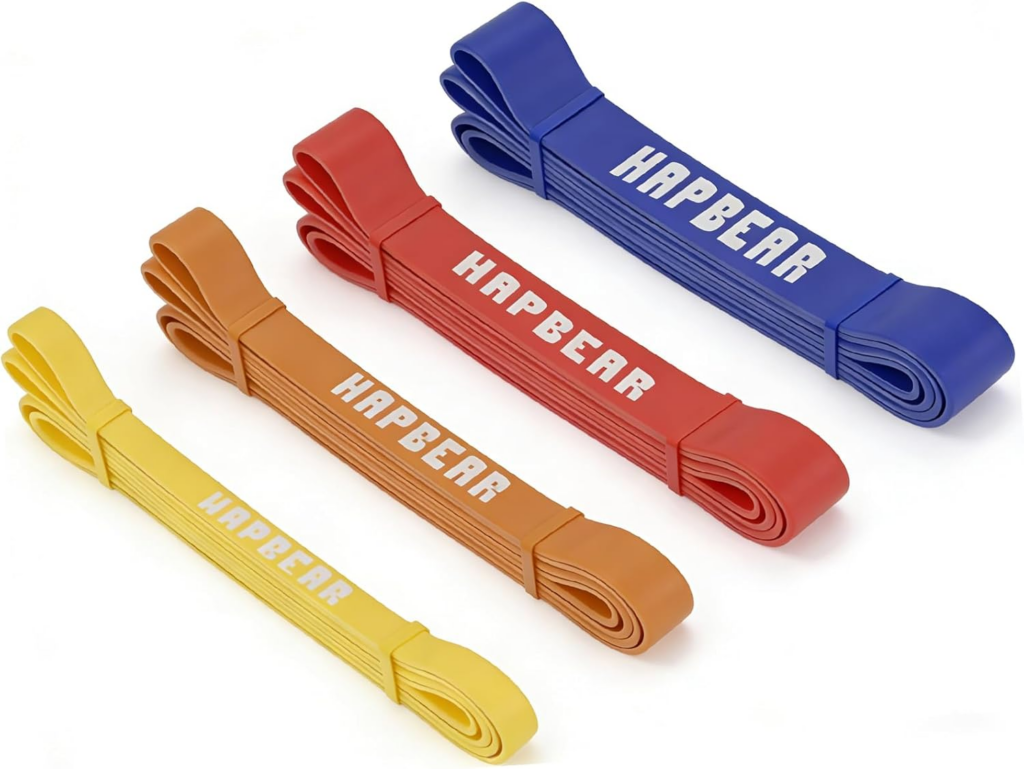
Why they’re great: Pull-up assistance bands come in various resistance levels, allowing you to reduce the amount of body weight you’re lifting during pull-ups and other challenging exercises. This makes previously impossible movements accessible while you build the strength to eventually perform them unassisted. The thick loop design also makes them incredibly versatile for strength training, stretching, and mobility work beyond just pull-ups.
How I use them: To start, I loop a band around my pull-up bar and step into it to offset some of my body weight during pull-ups and chin-ups. As I’ve gotten stronger, I’ve progressed to lighter resistance bands. I also use them for band-assisted dips, pistol squats, and Nordic curls—exercises where a little assistance makes the difference between performing the movement correctly and not doing it at all. Additionally, I anchor them for stretching my shoulders and hips, and use them for resistance training like banded deadlifts to add accommodating resistance at the top of the movement.
👉 These bands make pull-ups and advanced strength work far more accessible.
Key technique: For assisted pull-ups, loop the band over the bar and pull one end through the other to secure it. Step one foot (or both feet for more assistance) into the bottom of the loop. The band will push you upward, reducing the amount of body weight you need to pull. Focus on controlled movement and full range of motion—the goal is to build strength, not just get your chin over the bar. As you get stronger, progress to lighter bands until you can perform unassisted pull-ups.
Bonus use: These bands are excellent for powerlifting-style accommodating resistance. Loop them around a barbell and anchor the bottom to add increasing resistance through your range of motion during squats or bench press.
Final Thoughts
What I love most about these ten items is their versatility and accessibility. None require a gym membership, and together they cost less than a year of boutique fitness classes. They’ve helped me build strength, prevent injuries, recover faster, and add variety to my workouts.
The key to getting the most from any fitness tool is consistency and proper technique. Start slowly, focus on form, and pay attention to how your body responds. These items have become non-negotiables in my routine—I hope they’ll enhance yours too.
Image Disclaimer:
Product images displayed on this page are sourced from the respective brands and/or Amazon product listings for reference purposes only. All trademarks, logos, and images are the property of their respective owners.